
17 Practical Woodworking Projects To Do at Home
Woodworking is a hobby that can look rather daunting; reviewing the tool setups possible on some videos make you wonder how you can ever find the space or afford the tools. But there are many simple and practical woodworking projects to do at home that can be easily worked in a small space and with just a few tools.
In fact, many skilled woodworkers enjoy finding practical woodworking projects that can be built using just a few tools. If your space is small, keep an eye out for projects that offer more storage options such as small shelf units. Other helpful projects include storage boxes that can serve both, as a side table, and as a covered storage for out-of-season garments or blankets.
"There are many simple and practical woodworking projects to do at home that can be easily worked in a small space."
Table of Content
The Beauty of Woodworking
Learning to work with wood helps you develop your problem-solving skills, increase your mathematical know-how, and build your ability to visualize. If you're attempting to learn woodworking in a cramped space, you can also develop your ability to think in a linear fashion and really build your planning skills.
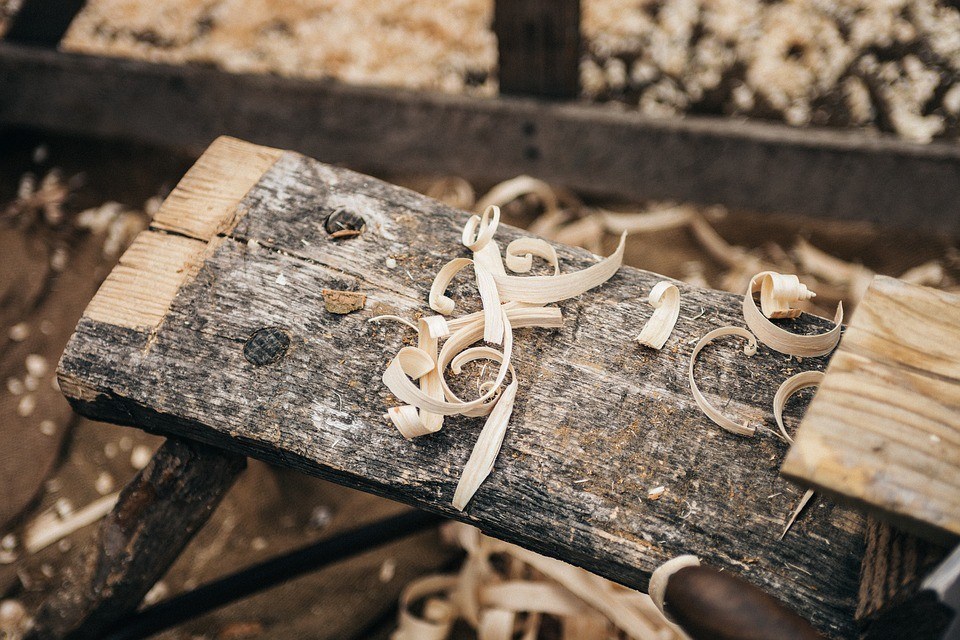
Woodworking requires focus, and that can be hard to find in our modern, hyper-connected world. Your woodshop can be a place free of electronic devices, or at least a place where you check your cell phone at the door. The process of working with your hands, measuring out a project and assembling your work impacts the brain in ways that simply watching videos or even studying in a book can't.
Woodworking is also a way to constantly remain a student. Learning new skills is a great way to strengthen your sense of control over your life and build your confidence.
Additionally, a basic level of physical fitness is necessary to woodwork. As a general rule, this activity requires you to stand, bend, lift and twist. If your day to day work involves spending a lot of time in a chair, this hobby can help your brain and your body!
Can I Do Woodworking at Home?
You don't need a large shop to start a woodworking space. While it's true that you will need electrical power and some form of dust control, you can start small.
No matter what tools you own or want to buy, safety is your first stop. Be certain that you invest in safety goggles; if you wear glasses, shop and try on goggles until you find a pair that will fit over your existing glasses. Invest in a box of neoprene gloves to protect yourself from splinters, particularly if you're handling pallet wood. Ear protection is critical, as is a dust mask. There are some small air handlers you can invest in to keep the dust down as well.
Finally, get a roll of heavy-duty plastic and some duct tape to cover nearby doorways, storage shelving, and the family car. Sawdust is fun to make, but if you cause a mess, your woodshop may become a source of trouble!
Invest in a good pair of sawhorses, or build a pair suited to your height. If you have an old slab door, use this as your tabletop across the sawhorses. Now you have a spot for your tools and a workspace.
A shop vacuum is a great tool for a beginning woodworker. Begin every session with your safety protection and end it with some vacuuming, and both your projects and your woodshop will be a welcome addition to the household!
2019 Top 17 Practical Woodworking Projects
#1 DIY Wine Glass Holder


Source: Black+Decker
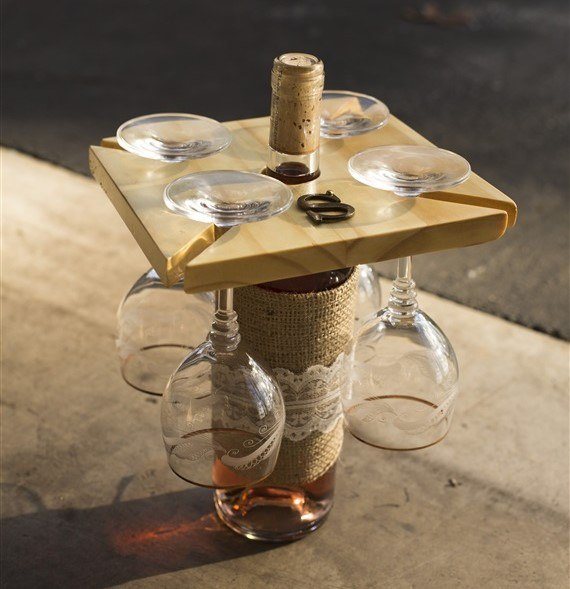
This wine glass holder is a great reminder of the beauty that can be found in small pieces of wood. To complete this task, you need a piece of wood 7.5 inches square. Make sure that if there are any knots, they're not in the middle of the board or at any of the corners.
A knot in a piece of wood points to an area of the living tree where a branch died and fell off. While knots can be pretty, be aware that the wood around a knot and inside the knot will be a much different texture than the wood around it; it may be harder to cut and may fall out as you work around it.
The pattern for the wine glass holder is fairly straightforward. The hole in the middle of the board fits over the bottle top, and the slots in the corner hold the wine glass stems. You may find that you'll get a better fit if you taper the center hole to flare down over the wine bottle so it doesn't wobble.
However you finally decide to design this, you'll wind up with a useful bit of craftwork that would make an ideal gift presentation!
#2 DIY Birdhouses


Source: Acraftyspoonful
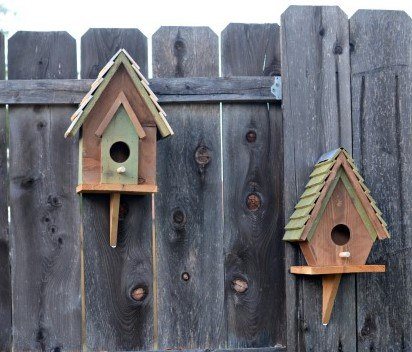
Birdhouses are wonderfully useful small projects that require you to drill a straight hole and build a durable joint where two pieces of wood come together. Our sample birdhouses feature, not only stained fence wood for long years of service, but also shingles!
These birdhouses are put together with a brad nailer and a manual staple gun. When working with either of these tools, it's important to work with clamps and straight edges. A metal square is a great tool for setting up a 90-degree angle, but it's not a clamp.
Many woodworkers have the luxury of a drill press, but with patience and a hole saw, you can perform many of the tasks that a drill press can do. The same is true of a table saw; it may take longer, but a carefully handled jigsaw can rip lumber.
Recommended:
I personally like to use a Ryobi Table Saw.
#3 DIY Headboard and Bed Frame


Source: DIYProjects
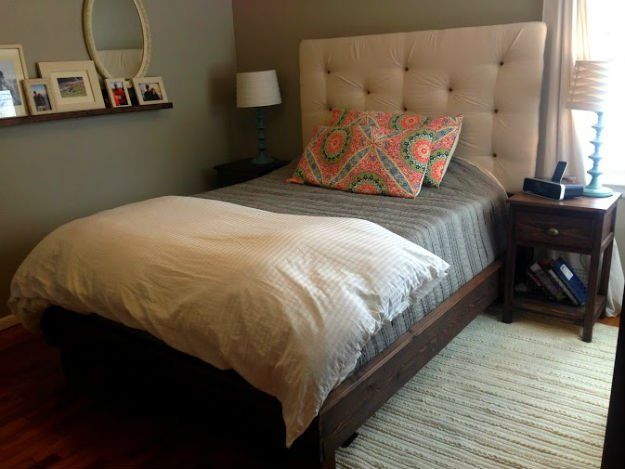
If you've got a futon but need a bed, this flexible DIY project will give you the chance to play with lumber, upholstery foam, quilt batting and stain for the base. Paint can also be used on your bed frame, so have fun. This project is easy to construct, endlessly flexible and will travel easily.
This is one of the best DIY furniture projects for older children. Not only can they spend some time learning about tool safety and proper handling, but they can customize the project and having something designed to their preference and built by themselves.
Please note that this project includes spray foam adhesive, which may be flammable. Work this project with plenty of ventilation and avoid using this project near fire, such as your furnace or hot water heater.
#4 Tiered Garden Shelf


Source: Thecwaftyblog
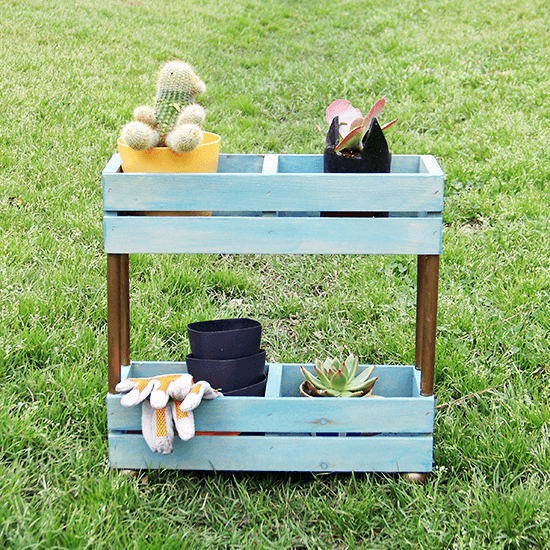
One of the most fun things about working with wood is that you can work with items already constructed, or take apart existing things to make other things. The tiered garden shelf features unfinished CD cases from the raw woods section of a popular craft shop.
The crates are flipped onto their backs to serve as a plant pot holding tray, and wooden furniture feet, pre-milled, are added to the bottom. Finally, the space between the shelves is flexible and can be customized depending on the length of your dowels.
This is another project with plenty of flexibility built right in. If you choose to use this stand for storing anything particularly heavy, or if children will be using it, consider mounting the dowels in flanges that you can screw to the crate for a bit more stability.
#5 Fall Porch and Outdoor X Table


Source: Sarahmdorseydesigns
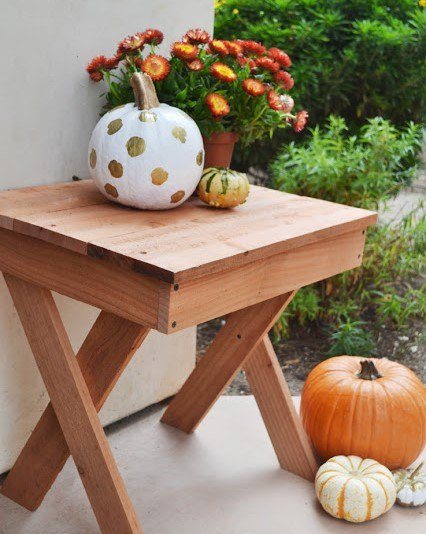
This adorable little side table offers all of the uniquely flexible characteristics of wood. It can be made with leftover fence boards, and it can be reverse-engineered so you can design it to fit with the materials you have.
The table in the example is built with materials suitable to the outdoors, but you can build yours to work inside your home. Determine the amount of lumber you have and plan accordingly. The template for the x-braces on which the table stands was a simple rectangle of scrap lumber; you could use cardboard if that's what you have.
Once the x-brace was laid out, the angle cuts for the top and bottom of the legs were determined, marked and cut. If you've got a miter saw, you can use that, but this layout on scrap means you don't have to take the time to figure out the angles.
#6 Wood Plank Wine Rack


Source: Camillestyles
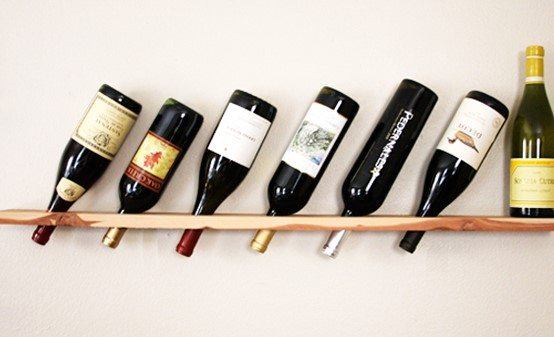
The visual expanse of a lot of wood, such as an oak floor or pine table top, is beautiful. However, a single piece of unique wood, such as cedar, hickory or tiger maple, can be striking.
This wood plank wine rack is not a quick project. While it may be built with hand tools, you will need to build a tool to hold the plank while you drill the holes at the right angle.
Be aware that the instructions don't offer much in terms of hanging your wine rack. Consider investing in decorative brackets to mount underneath; once loaded, this plank will be heavy.
#7 Space Saving Workbench


Source: Familyhandyman
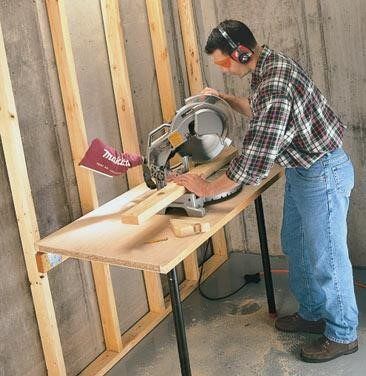
This simple but very useful fold down workbench could work in a lot of applications. If you're just starting out and don't have the funds for a kitchen table, this sturdy wall-mounted table could serve a small family quite well. This table could also serve as a craft workspace or sideboard if space is limited.
It takes a slab door or plywood, two lengths of metal pipe with flanges, a 2x4 as long as the doors, and some heavy duty hinges. Determine the height you need and cut the pipes to length. Mount the 2x4 to the wall at the right height to match the metal pipes.
With your drill, screw the hinges to one side of the door and the pipe flanges to the far corners of the door. Screw the pipes into the flanges to get to a proper working height, and get some help or some bracing; you'll need to crawl under your table to affix the hinges to the 2 x 4. Once you're done, remove the pipes and fold the table down. A work surface when you need it, space when you don't. Win-Win!
#8 Shoe Organizer


Source: Familyhandyman
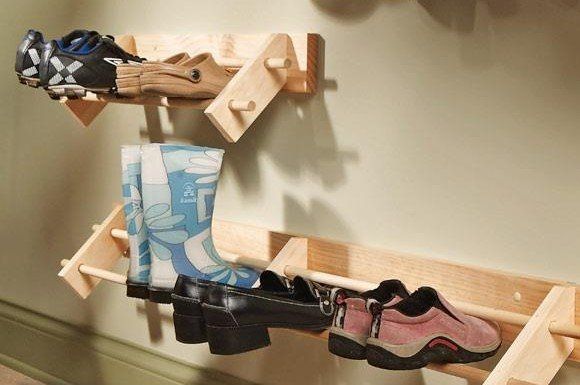
If you're looking for easy wood projects for kids, this is an ideal task. It's flexible, will fit in many different locations, and involves only a little cutting and some dowels. Plus, the kids get to practice finding wall studs!
This shoe organizer starts with two braces cut from your 1 x 4, with holes drilled per the pattern for the dowels. Mount the braces to your 1 x 3, run the dowels through the holes and screw or nail them in place.
It's important not to go too wide. If you can find dowels longer than 48 inches and want to put in a long shoe rack, put in extra braces to avoid bending the dowel over time.
#9 Magazine Storage Bins


Source: Familyhandyman
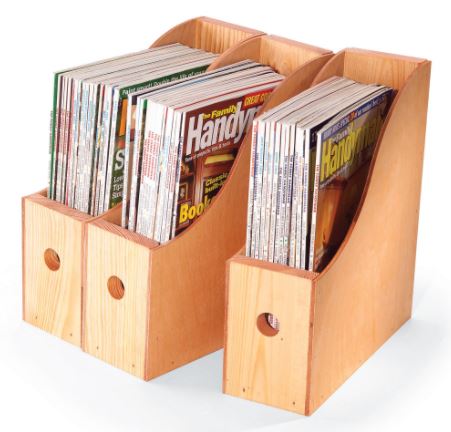
Looking for woodworking projects that sell? Storage is always popular, and these simple magazine racks would be very popular among scrapbookers and other craft fans.
The materials list for these magazine bins is quite short; you need 1/4 pine and 1/4" plywood. Birch plywood or 1/4" mahogany would finish nicely. To cut the curves, you need a 5-gallon bucket for a template.
Luckily, you can tape the plywood together to cut the curves. Work slowly and let your jigsaw do the job. Your 1 x 4 will line up with the edges of the plywood and you can nail the box together with a brad nailer.
You will need a drill to create a "pull hole" in the front of the box. Once you've cut your 1 x 4 into pieces of the proper length, you can quickly mark all four of these holes and drill them in quick succession.
#10 Outdoor Wooden Bench


Source: Familyhandyman
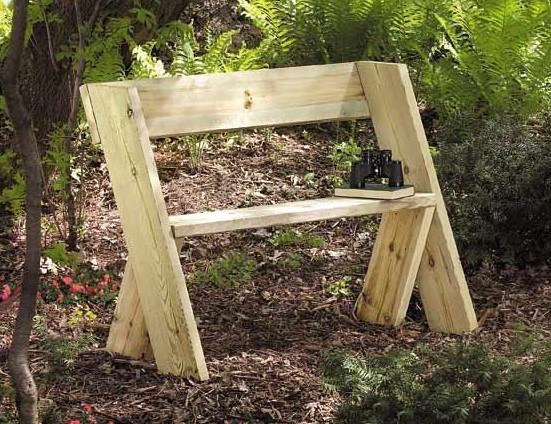
Looking for woodshop projects for high school students? This bench will certainly serve. It's constructed from two 10' long 2 x 8 pieces of weather resistant wood. Because people will be sitting on this, avoid anything that's prone to splintering.
This wooden bench is loaded with interesting angles. You'll also need a countersink drill bit. A circular saw will suffice to cut through the 2 x 8s. In this instance, a jigsaw would be hard pressed.
You will need a drill and 2-1/2" deck screws. Luckily, these screws are pretty forgiving and may be great practice for a drill novice.
#11 Sliding Bookend


Source: Instructables
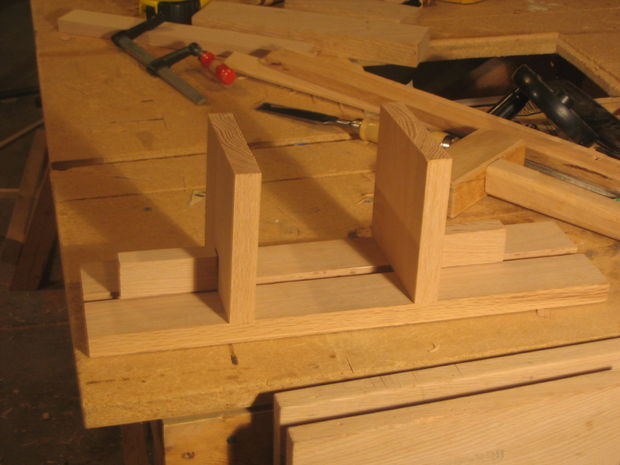
If you've got some small pieces of old or especially pretty hardwood, these sliding bookends demonstrate how small woodworking ideas can turn to strikingly beautiful projects.
These bookends feature a narrow slot and fit directly over the main body of the shelf to form a snug block against the weight of nearby books. This project would be beautiful done up in cherry, maple or oak. If you pick up the option to build the shelves as well as the bookends, you could decorate this bookshelf with a variety of hardwood bookends and come up with a beautiful, one of a kind piece of furniture.
#12 Simple Storage Box


Source: Instructables
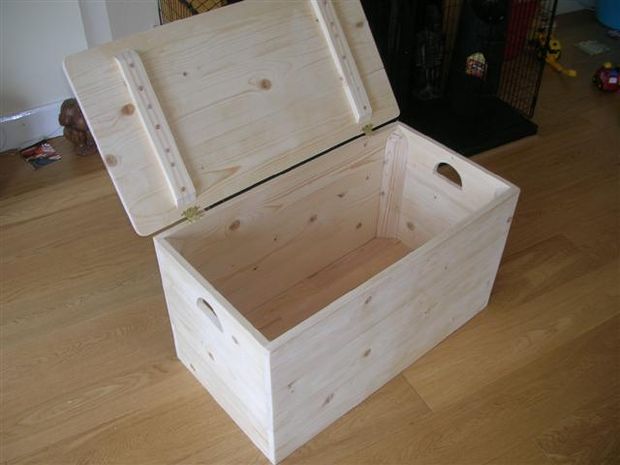
For those of us who use woodshop project ideas as a good excuse to go tool shopping, you're in luck! The simple storage box featured here requires a biscuit joiner. This tool is not a luxury; it makes it possible to join planks into platforms. You'll want to play with this for a while if you've never used one to make sure you get the cuts in the right place or your planks will have an edge.
#13 Picnic Table


Source: Instructables
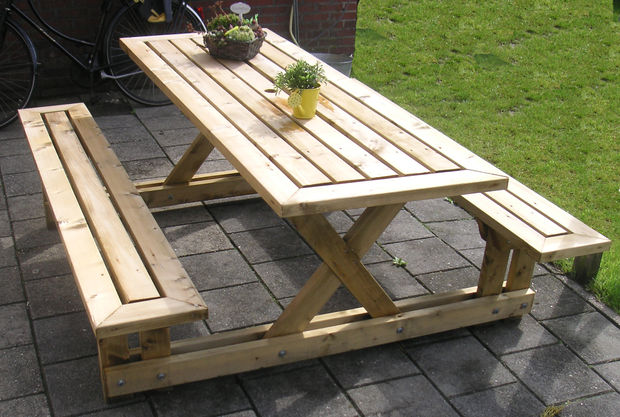
This is one of the most useful DIY wood furniture projects you'll find. While the footprint of this picnic table is larger than that of one with the benches built into the table, you'll have a lot more leg room with this design.
Your picnic table will be constructed entirely of 2 x 4's, so you know it will last. A new technique for many users, a dado joint, will need to be cut into the x-bracing of the legs. The table legs and bench legs all fit in the same trough, sized for the narrow edge of the 2 x 4.
The dado joint takes wood out of each piece of lumber that forms the x that supports the table. Once you know how much lumber needs to be removed, you can use a router or a chisel to perform this task.
#14 Wooden Cutting Board


Source: Fouroakscrafts
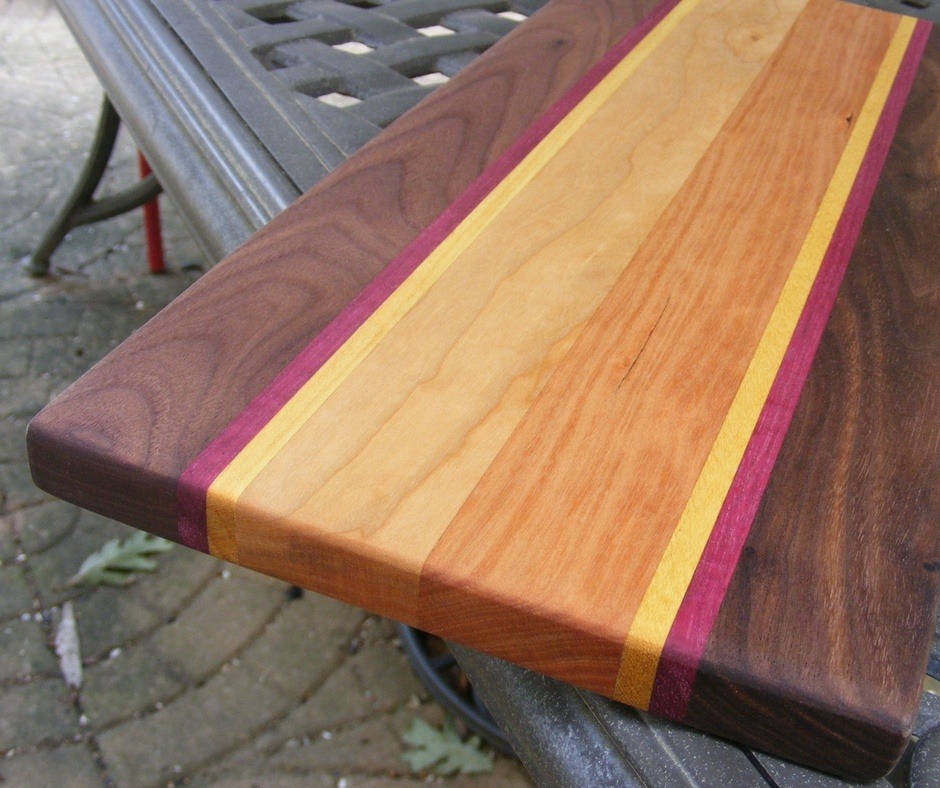
If none of your woodworking projects make money and you'd like to change that, building custom cutting boards may be a way to improve your cash flow. These tools can be made from small pieces of wood, carefully joined to other pieces of wood, so each will be unique and customized to the buyer.
Even tiny pieces of wood can be used in a custom cutting board. A small cutting board can prove to be very handy in an outdoor survival kit. You can also pair it with a good cheese knife for a great hostess gift. The possibilities are endless!
This video features a table saw. While the expert on the video below doesn't use a safety guard, beginner woodworking tools should never be used with the safety removed. Table saws cut whatever you put in front of them. Work your lumber wide enough that the safety guard stays on until you've got plenty of experience under your belt.
#15 Homemade Picture Frames


Source: Wifeinprogressblog
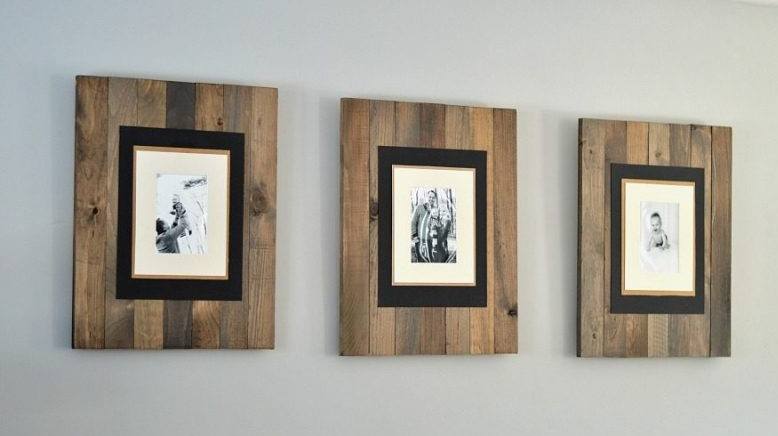
Homemade picture frames offer decorators the chance to put custom pieces of art, glass or fabric projects into a specially fitted frame for beauty and enjoyment. These are great wood projects for beginners and can be built with a miter saw set at 45 degrees, or a table saw with a 45-degree jig.
Custom picture frames can be made from new lumber or old frames, and large frames can be cut down for unique items. If you're looking for small woodworking projects that you can play with to build up your saw skills, custom picture frames are an ideal project to start on!
#16 Natural Edge Lazy Susan


Source: Woodworkweb
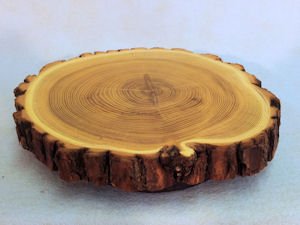
Woodworkers of all stripes will like this project! You start with a chainsaw, work with grinders of several sizes, and finally finish up with a dressmaker's iron!
For safety's sake, hit a second-hand shop and pick up an iron for your shop. Do not raid the laundry room for this tool; the adhesive used in the heat activated wood tape is very strong and sticky. Do not get that glue on the household iron.
As shown in the video below, the natural edge lazy susan is a striking piece that will be a beautiful display for party food on a picnic table. This piece will lend itself beautifully to any rustic decor or hearty food display. Gorgeous!
#17 Furniture Finish Guide


Source: Thechronicleherald
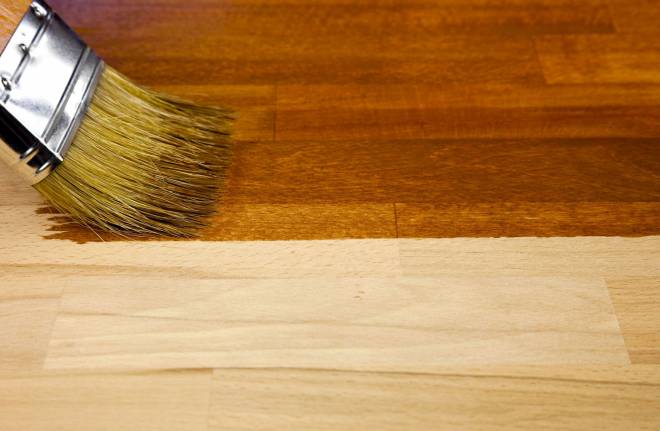
Your wood projects ideas will really sparkle in the final application if they receive a great finish. Do you want to stain the piece, or leave it natural? Are you planning on water or oil based finish?
In the following video, expert Colin Knecht recommends testing the moisture in your woodworking shop before you start finishing; if the humidity is too high, the wood may swell and the finish will dry too slowly. If your shop is especially vulnerable to the elements, you may actually have to check the weather before applying the finish. It's also a good idea to check the grain with a bit of rubbing alcohol; if the wood muddies up, it needs a bit more fine sanding.
Your end-use is critical in choosing a finish. Many easy small wood projects, such as cutting boards, need a food-safe finish.
Conclusion
Ready to start building your woodshop? This fun and productive hobby will bring you great joy. Wood is responsive and endlessly useful, and once you're familiar with a pattern or process, you can customize it to suit the needs of your space. From side tables to storage shelves, wine racks to picnic tables, this hobby will add to your quality of life. Please let us know if this article was helpful, and tell us of your woodworking adventures!


